Group Settings
Access Level
Owner access required
Overview
Group Settings allows administrators to manage how your organisation operates within the Match Official System. You can control user registration, calendar dates, folder access, notification settings, and how users interact with assessments and plans.
How to Access
From the main menu, click Admin then Group Settings.
Before You Start
- You must be an administrator with the correct access level
- Changes to group settings affect all users in your group
- Some settings are destructive (such as folder deletion) and cannot be easily undone
- Your group's licence information is displayed at the top of the page
Major Settings
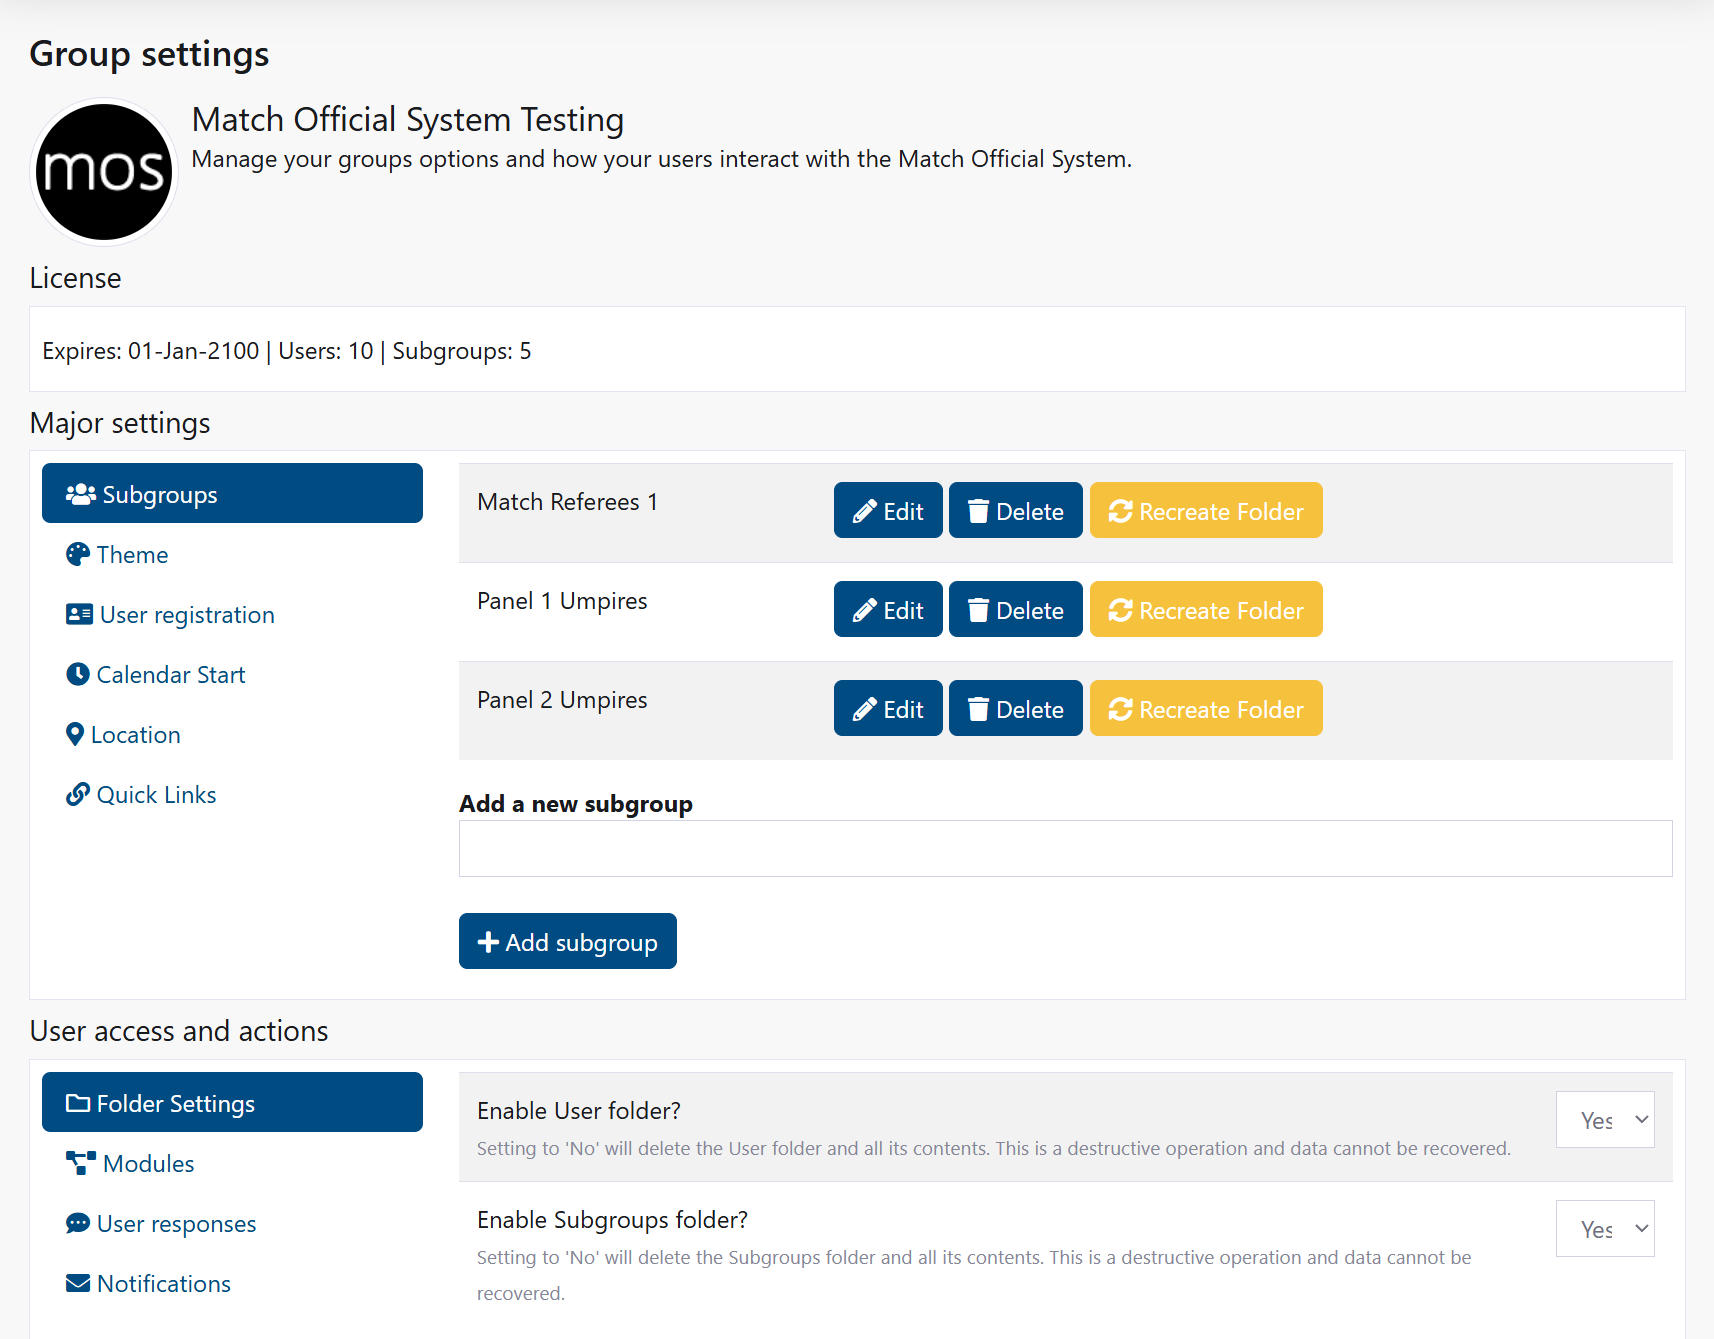
Subgroups
Subgroups allow you to organise users within your group. Users can be assigned to one or more subgroups for filtering, reporting, and targeted communications.
View and manage existing subgroups:
- Navigate to Group Settings
- Click the Subgroups tab
- You see a list of all subgroups in your group
- For each subgroup, you can:
- Click Edit to rename it
- Click Delete to remove it (the subgroup folder will be deleted)
- Click Recreate Folder to restore a missing folder (if folder viewing is enabled)
Add a new subgroup:
- In the Subgroups section, enter the subgroup name in the text field
- Click Add subgroup
- A new subgroup is created with its own folder
- You can now add users to this subgroup
Note
The number of subgroups you can create depends on your licence.
Group Logo
Upload a logo image to represent your organisation in MOS.
- In the Major Settings section, click the Logo tab
- If a logo is already uploaded, a preview is shown
- Click Choose file and select a PNG or JPG image (maximum 2MB)
- Click Upload logo
- The logo is saved and displayed for your group
Theme
Select a colour theme for your group. This affects the appearance of the system for all users in your group, unless they choose their own theme in their profile settings.
Change the group theme:
- In the Major Settings section, click the Theme tab
- Click on a theme image to select it
- The system reloads and applies your new theme immediately
- All users in your group see the new theme
Requesting a new theme is possible by contacting Cortana Design.
User Registration
Control whether new users can self-register for your group. When enabled, users can request access via a registration link.
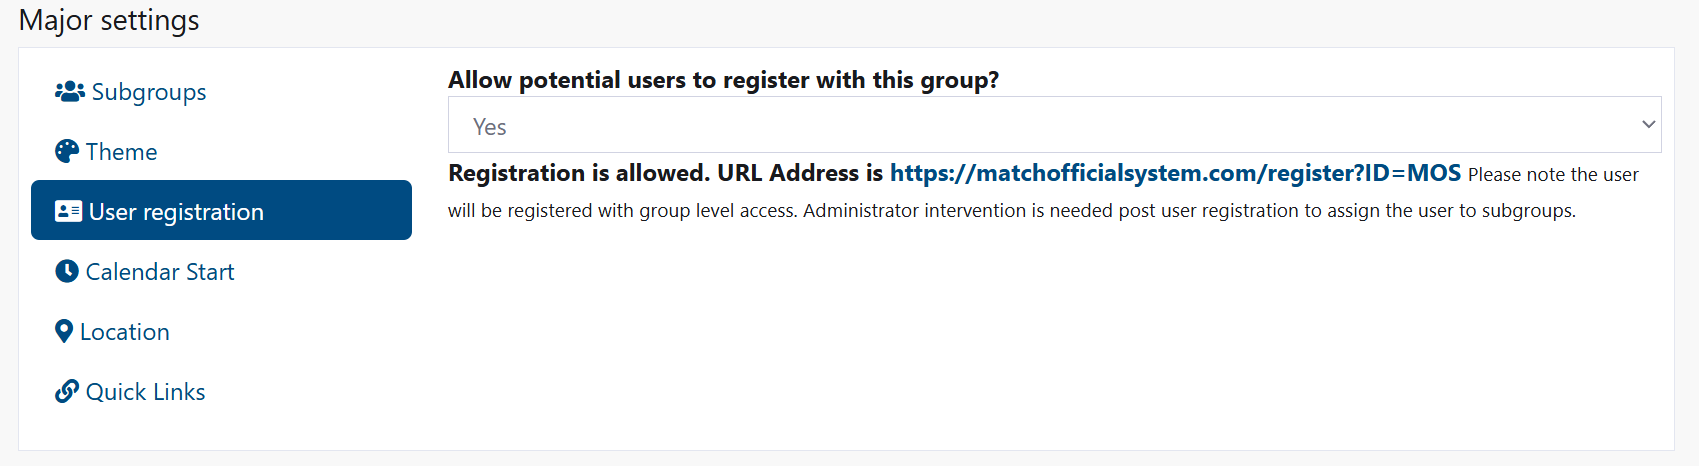
Enable or disable user registration:
- Click the User registration tab
- Select Yes to allow registration or No to disable it
- If enabled, you see a registration URL that you can share with potential users
- New users who register will have group-level access (administrators must assign them to subgroups afterwards)
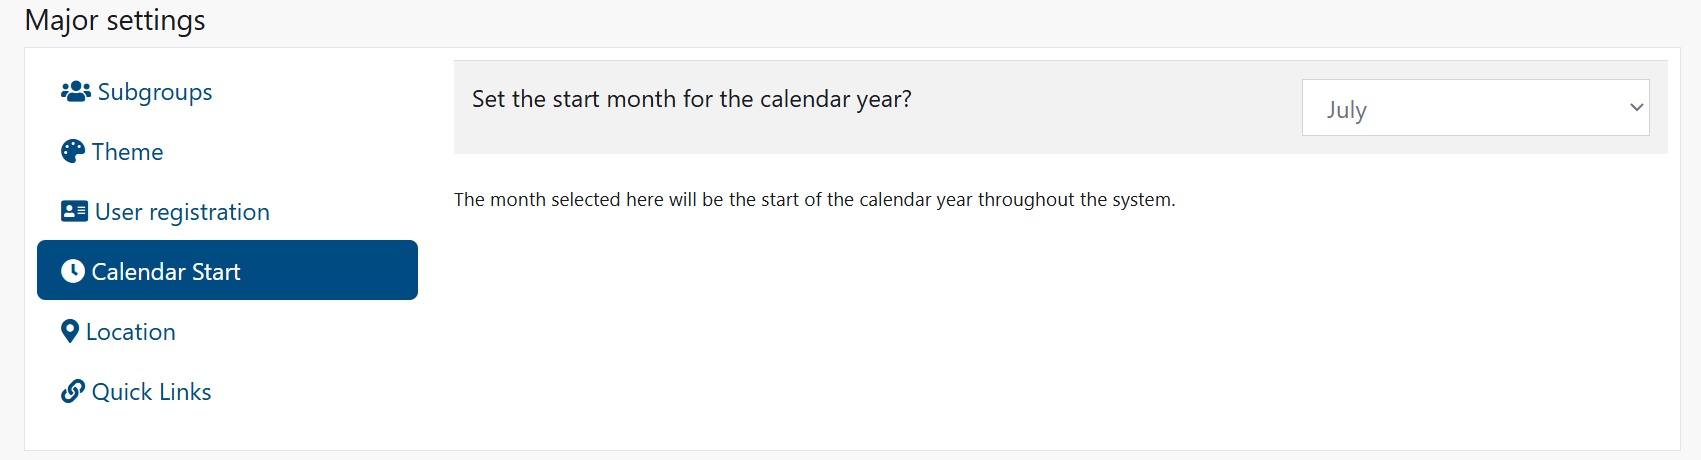
Calendar Start
Set when your group's calendar year begins. This affects seasonal reporting and date filtering throughout the system.
Change the calendar start month:
- Click the Calendar Start tab
- Select your preferred starting month from the dropdown
- The selected month is now the first month of your calendar year throughout the system
Location
Set your group's default location for weather information and other location-based features.
Save location details:
- Click the Location tab
- Enter your group's location (town/city)
- Enter your postcode
- Click Save location
- Result: These details are stored and used for location-based features
Quick Links
Manage the shortcut links displayed on the home page for your group. These provide quick access to frequently used external resources.
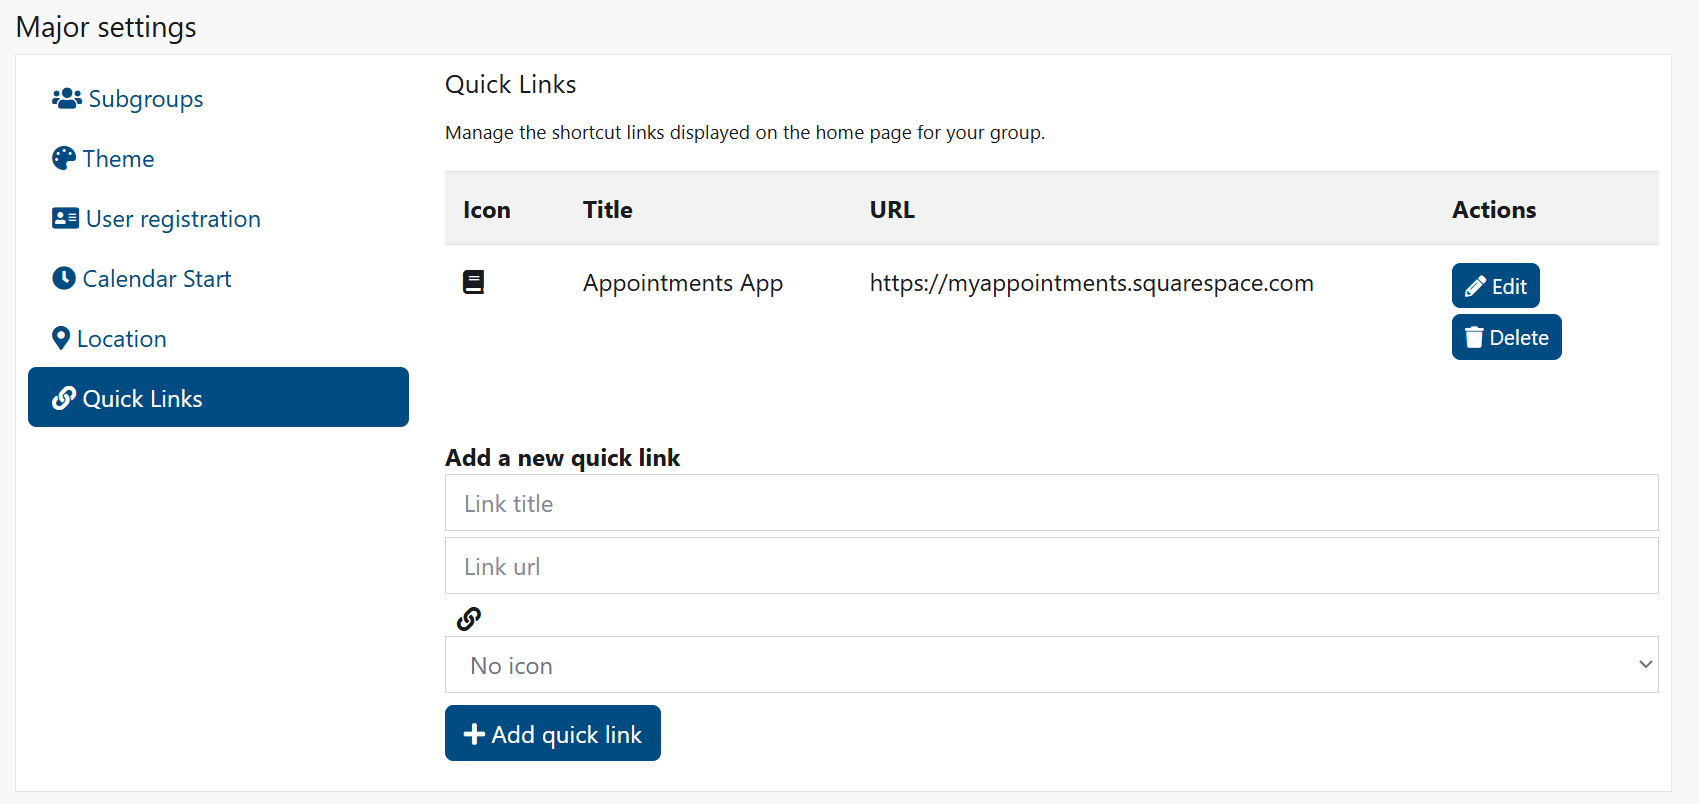
View quick links:
- Click the Quick Links tab
- You see a table of all links currently displayed
Add a new quick link:
- In the Quick Links section, enter:
- Link title: The text users see
- Link url: The full web address (e.g., https://example.com)
- Icon: Select an icon from the dropdown (optional)
- Click Add quick link
- The link is added to the home page immediately
Edit a quick link:
- Click Edit next to the link
- Update the title, URL, or icon
- Click Update
Delete a quick link:
- Click Delete next to the link
- The link is removed from the home page
Member Profile Fields
Define custom profile fields that your members must complete. These allow you to collect additional information beyond standard fields, such as emergency contact details, working with children checks, or specific job categories.
What You Can Collect
Financial and authentication data (credit cards, bank account numbers, passwords) cannot be collected. The system blocks sensitive data patterns.
View existing member fields:
- Click the Member Fields tab in Group Settings
- You see a table of all fields currently defined for your group
- For each field, you see:
- Label — The field name displayed to members
- Type — Text, number, date, long text, dropdown, or checkbox
- Category — The information category (personal, employment, medical, etc.)
- Required — Whether members must complete this field
- Active — Whether the field is currently visible to members
Add a new member field:
- Click the Member Fields tab
- Scroll to the Add a new member field section
- Enter:
- Field label — What to call the field (e.g., "Working with Children Check")
- Type — Choose from: Text, Number, Date, Long text, Dropdown, Checkbox
- Category — Choose from: Personal, Emergency Contact, Identification, Employment, Medical, Other
- Sort order — Number controlling display order (0 = first, higher numbers appear lower)
- Check Required if members must complete this field
- If type is Dropdown, enter options as a JSON array (e.g.,
["Option A","Option B"]) - Click Add field
- Confirmation: "Field added"
Edit an existing member field:
- In the Member Fields table, click Edit next to the field you want to change
- Update:
- Label
- Type
- Category
- Sort order
- Required status
- Active status (uncheck to hide from members without deleting data)
- Dropdown options (if applicable)
- Click Save
- Confirmation: "Field updated"
Delete a member field:
- Click Delete next to the field
- Warning message: "Deleting this field will also remove all member values for it. This cannot be undone."
- Click confirmation to delete
- Confirmation: "Field deleted"
- All values members entered for this field are permanently removed
Export member field data as CSV:
- In the Member Fields tab, click Export member data as CSV
- A file downloads containing:
- One row per member
- Columns for each active field
- Member name and email
- All responses to custom fields
- Use this for reporting, planning, or integration with other systems
Field Type Reference
Text
- Single line of text
- Examples: name, check number, license plate
- Members type freely
Number
- Numeric values only
- Examples: years of experience, staff ID
- No special characters allowed
Date
- Calendar date picker
- Format: automatically formatted for your region
- Examples: date of birth, expiry date
Long text
- Multiple lines of text
- Examples: medical conditions, allergies, notes
- Allows free-form paragraphs
Dropdown
- Fixed list of options
- Members choose one from the list
- You provide options when creating the field
- Examples: position type, status, shift preference
Checkbox
- Boolean (yes/no or confirmed)
- Members check the box if applicable
- Examples: "I agree to...", "I have completed..."
Field Categories
Choose a category that accurately describes the information type. Categories help you and members understand what the field is for, and the system blocks sensitive categories:
- Personal — General personal details (age, preferences, interests)
- Emergency Contact — Next of kin, emergency contact name and number
- Identification — Government-issued IDs, working with children checks, licenses
- Employment — Job role, employer, department, qualifications
- Medical — Allergies, medical conditions, blood type, medications
- Other — Miscellaneous non-sensitive fields
Blocked Categories
Financial information (bank accounts, card numbers) and authentication data (passwords) cannot be collected. The system automatically detects and blocks these patterns.
Member Experience
When members log in, they see:
- Group Info tab appears on their profile page (only if you've defined fields)
- A form with all active fields your group has created
- Required fields marked with a red asterisk (*)
- Appropriate input controls for each field type
- Save button to submit responses
Members can update their responses at any time unless you deactivate the field.
Common Field Examples
Uniform/Sizing:
- Field: "Shirt Size", Type: Dropdown, Category: Personal
- Options:
["XS","S","M","L","XL","2XL","3XL"]
Emergency Contact:
- Field: "Emergency Contact Name", Type: Text, Category: Emergency Contact, Required: Yes
- Field: "Emergency Contact Number", Type: Text, Category: Emergency Contact, Required: Yes
Safety Checks:
- Field: "Working with Children Check Number", Type: Text, Category: Identification
- Field: "Check Expiry Date", Type: Date, Category: Identification
Employment:
- Field: "Job Title", Type: Dropdown, Category: Employment
- Options:
["Head Coach","Assistant Coach","Club Official","Volunteer"]
Medical:
- Field: "Medical Conditions", Type: Long text, Category: Medical
- Field: "Allergies", Type: Long text, Category: Medical
User Access and Actions
These settings control what features users can access and what actions they can perform.
Folder Settings
Control which file storage folders are available for your group. Disabling a folder will permanently delete all files within it.
Enable or disable folders:
- Click the Folder Settings tab
- For User folder: Select Yes to enable or No to disable
- For Subgroups folder: Select Yes to enable or No to disable
- Click Save user settings at the bottom of the page
Warning
Setting a folder to 'No' will delete the folder and all its contents. This is a destructive operation and data cannot be recovered.
Modules
Enable or disable specific features for users in your group.

Enable or disable peer assessments:
- Click the Modules tab
- Select Yes to allow peer assessments or No to disable them
- Click Save user settings
Enable or disable user search:
- In the Modules section, select Yes to allow users to search profile information or No to disable it
- Click Save user settings
User Responses
Set how users can submit diary and plan entries, including confidentiality and review options.
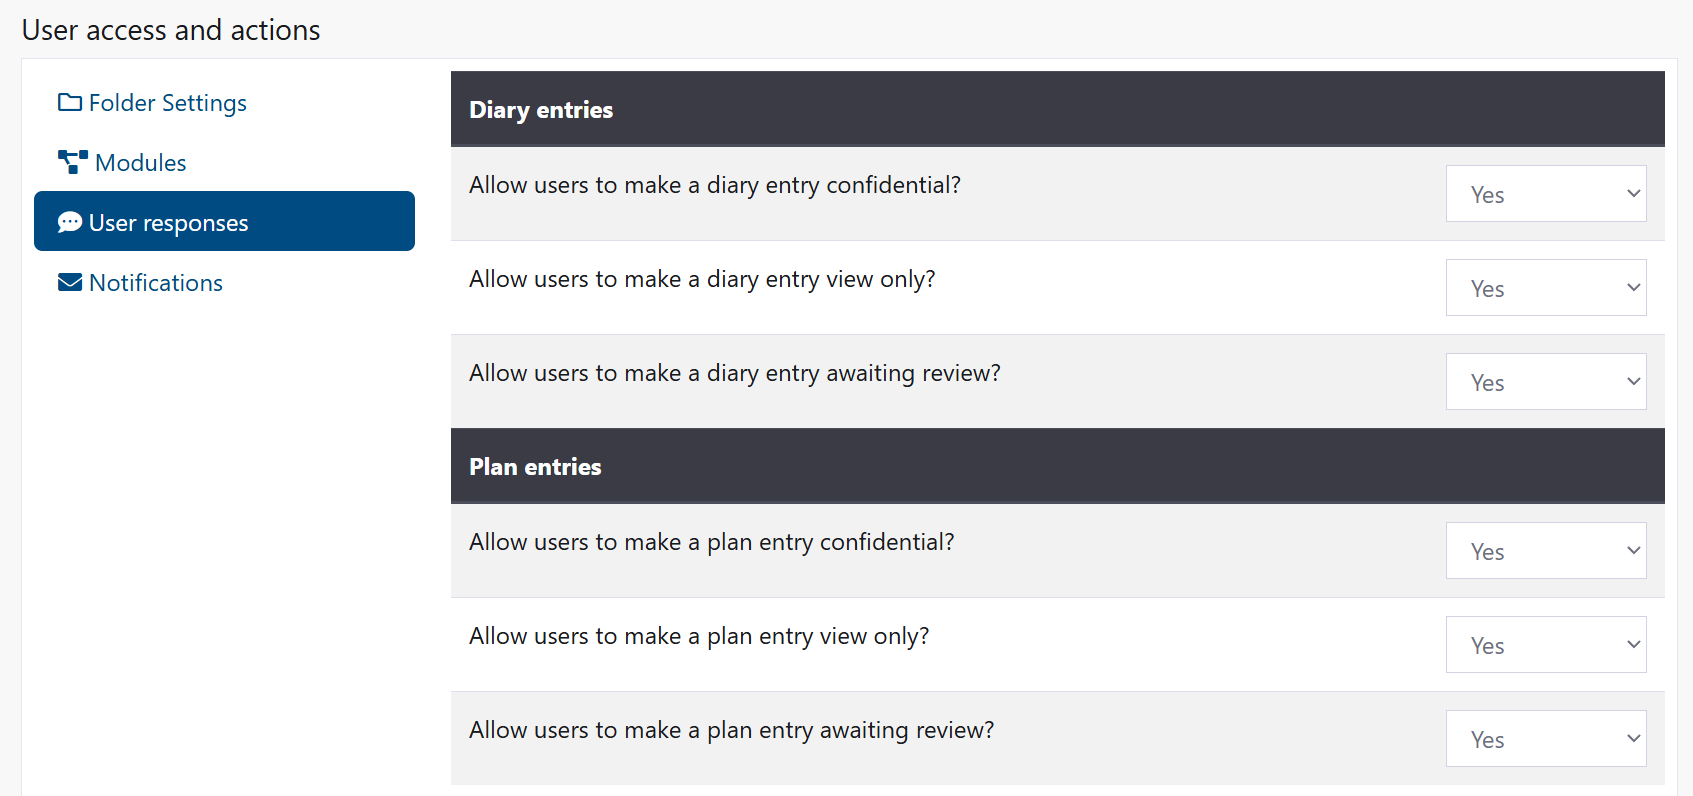
Diary entries - Allow users to:
- Click the User responses tab
- Make entries confidential: Select Yes or No
- Make entries view only: Select Yes or No
- Request a review: Select Yes or No
Plan entries - Allow users to:
- Make entries confidential: Select Yes or No
- Make entries view only: Select Yes or No
- Request a review: Select Yes or No
Assessment feedback - Allow users to:
- Submit feedback on assessments: Select Yes or No
- When enabled, users can provide a one-time feedback response after viewing an assessment
- Click Save user settings
Notifications
Configure automatic email notifications for various activities.

Diary notification settings:
- Click the Notifications tab
- Under "Notifications for diary entries", choose Yes or No for:
- Notify reviewers of new review requests
- Notify user when reviewed
- Notify reviewer when unread entry is seen by user
- Click Save user settings
Assessment notification settings:
- Under "Notifications for assessment entries", choose Yes or No for:
- Notify user when new assessment is assigned
- Notify reviewer when assessment is seen by user
- Notify reviewer when user submits feedback on an assessment
- Click Save user settings
Plan notification settings:
- Under "Notifications for plan entries", choose Yes or No for:
- Notify reviewers of new review requests
- Notify user when reviewed
- Notify reviewer when entry isings**
Peer review notification settings:
- Under "Notifications for peer review entries", choose Yes or No for:
- Notify user of review
- Notify admin(s) of review
- Notify reviewee when review seen
- Notify admin(s) when review seen
- Click Save user settings
Common Tasks
Define a custom member profile field
- Navigate to Group Settings
- Click the Member Fields tab
- Scroll to Add a new member field
- Enter a field label (e.g., "Emergency Contact Phone")
- Select the field type
- Choose a category
- Set the sort order number
- Check Required if members must complete it
- Click Add field
- Members see the new field in their Group Info tab
Create a dropdown field with options
- Go to Group Settings and click Member Fields
- In the Add field section, select Dropdown as the type
- In the Dropdown options field, enter JSON format options
- Example:
["Morning","Afternoon","Evening"] - Each option must be in quotes, separated by commas, inside brackets
- Click Add field
Hide a member field without deleting data
- Click Member Fields tab
- Click Edit next to the field
- Uncheck the Active checkbox
- Click Save
- The field is hidden from members but all their data is preserved
- You can reactivate it later
Export all member profile data
- Click Member Fields tab
- Click Export member data as CSV
- A file downloads with all member responses to custom fields
- Open in Excel or your spreadsheet application
- Use for reporting, planning, or to integrate with other systems
Change the order fields appear to members
- Click Member Fields tab
- For each field, click Edit
- Change the Sort order number (lower numbers appear first)
- Click Save
- Fields are instantly reordered on members' profiles
Make a field required
- Click Member Fields tab
- Click Edit next to the field
- Check the Required checkbox
- Click Save
- Members cannot save their profile without completing this field
- A red asterisk (*) appears next to required fields
Create a new subgroup
- Navigate to Group Settings
- In the Subgroups section, enter a name for your new subgroup
- Click Add subgroup
- The subgroup is created with its own folder
- Add users to the subgroup through the Membership section
Change your group's theme
- Go to Group Settings
- Click the Theme tab
- Click on the theme image you want to use
- The page reloads with the new theme applied
Enable user registration for your group
- Go to Group Settings
- Click the User registration tab
- Select Yes
- Share the registration URL with potential users
- New users can register themselves
Set when your calendar year starts
- Go to Group Settings
- Click the Calendar Start tab
- Select the month your calendar year begins
- All dates throughout the system reflect this starting month
Add multiple quick links
- Go to Group Settings
- Click the Quick Links tab
- Add the first link: enter title, URL, and icon, then click Add quick link
- Add the second link: repeat the process
- Continue for each link
- All links appear on the home page in order
Restrict folder access
- Go to Group Settings
- Click the Folder Settings tab
- Select No for User folder or Subgroups folder (or both)
- Click Save user settings
- Users no longer see or access that folder
Warning
Folders will be deleted along with all their contents.
Troubleshooting
Settings not saving
Symptoms
- You click Save but the settings don't change
- Error message appears
How to fix
- Check that you have administrator access
- Verify all required fields are completed
- Try saving again
- If the problem continues, contact your system administrator
Common causes
- Insufficient access permissions
- Missing or invalid information in fields
- Browser cache issues
Member field not appearing to users
Symptoms
- You created a field but members don't see it
- The field was active but disappeared
How to fix
- Go to Group Settings and click Member Fields
- Verify the field is in the table with Active status
- Check the field isn't marked as inactive (broken eye icon)
- Ask the member to:
- Refresh their browser
- Log out and log back in
- Clear their browser cache
- If the field still doesn't appear, try editing and saving it again
Common causes
- Field is marked as inactive
- Browser cache preventing display
- Member hasn't refreshed their profile page
Group Info tab not visible to members
Symptoms
- Members don't see the Group Info tab on their profile
- You've created fields but they won't appear
How to fix
- Click Member Fields in Group Settings
- Check your Member Fields table
- Verify you have at least one field that is Active
- If fields exist and are active, ask members to:
- Refresh the page (Ctrl+R or Cmd+R)
- Clear browser cache
- Log out and back in
- If nothing appears, all your fields may be inactive
Fields saved but member responses are blank
Symptoms
- Fields appear but show empty values
- Members report they entered information but it's not saved
How to fix
- Check if the field is marked as Required
- Ask members to click Save after entering data
- Verify the field exists and is active
- If a required field is empty, members cannot save their profile — this is intentional
- Check the field type matches what you intended (dropdown vs text, etc.)
Can't delete a field because data exists
Symptoms
- You click Delete on a field
- Warning message shows data will be lost
How to fix
- If you want to keep the data, click Cancel
- Instead, click Edit and uncheck Active to hide the field
- If you definitely want to delete the field and its data, click the confirmation
- Warning: This is permanent and cannot be undone
Alternative: Export the member field data to CSV before deleting, so you have a backup.
Dropdown field showing invalid options
Symptoms
- Members see garbled or broken options in a dropdown
- Options don't display correctly
How to fix
- Click Member Fields and find the dropdown field
- Click Edit
- Check the Dropdown options field in JSON format
- Ensure:
- Options are in quotes:
"Option" - Separated by commas:
"Option A","Option B" - Wrapped in brackets:
["Option A","Option B"]
- Options are in quotes:
- Click Save
- Ask members to refresh their page
Example correct format:
["XS","S","M","L","XL","2XL"]
Members report validation error for sensitive data
Symptoms
- Members trying to enter information get an error
- Error mentions "financial" or "sensitive data"
This is intentional — the system protects sensitive information:
- Financial data (credit cards, bank account numbers, IBANs, BSB numbers)
- Authentication data (passwords)
What to do:
- Don't collect this information via profile fields
- Choose a different field category if safe (e.g., use "Identification" for driver's license numbers, not "Financial")
- Use a different secure system for truly sensitive data
- If unsure if something should be collected, contact your system administrator
Quick links not appearing on home page
Symptoms
- You added a quick link but don't see it
- Links appear for some users but not others
How to fix
- Go back to Group Settings
- Click the Quick Links tab
- Verify the link was created (it should appear in the table)
- Check that the URL is valid and starts with http:// or https://
- Clear your browser cache and refresh the page
Common causes
- URL format is incorrect
- Browser cache preventing display of new link
- User permissions preventing access
Folder is missing
Symptoms
- A subgroup folder is marked as missing
- Users cannot access the folder
How to fix
- Go to Group Settings
- In the Subgroups section, click Recreate Folder next to the missing subgroup
- The folder is recreated
- Users can now access it again
Note: Folder recreation is only available if folder viewing is enabled in Folder Settings.
Related Pages
- AI Features - Configure who can access AI tools in your group
- Billing - Manage your subscription and licence
- Assessment Templates - Configure assessment types and templates
- User Management - Add and manage users
- Membership and Roles - Assign users to groups and subgroups