Folders
Access Level
All users. Note however some permissions are controlled by your group administrator(s).
Overview
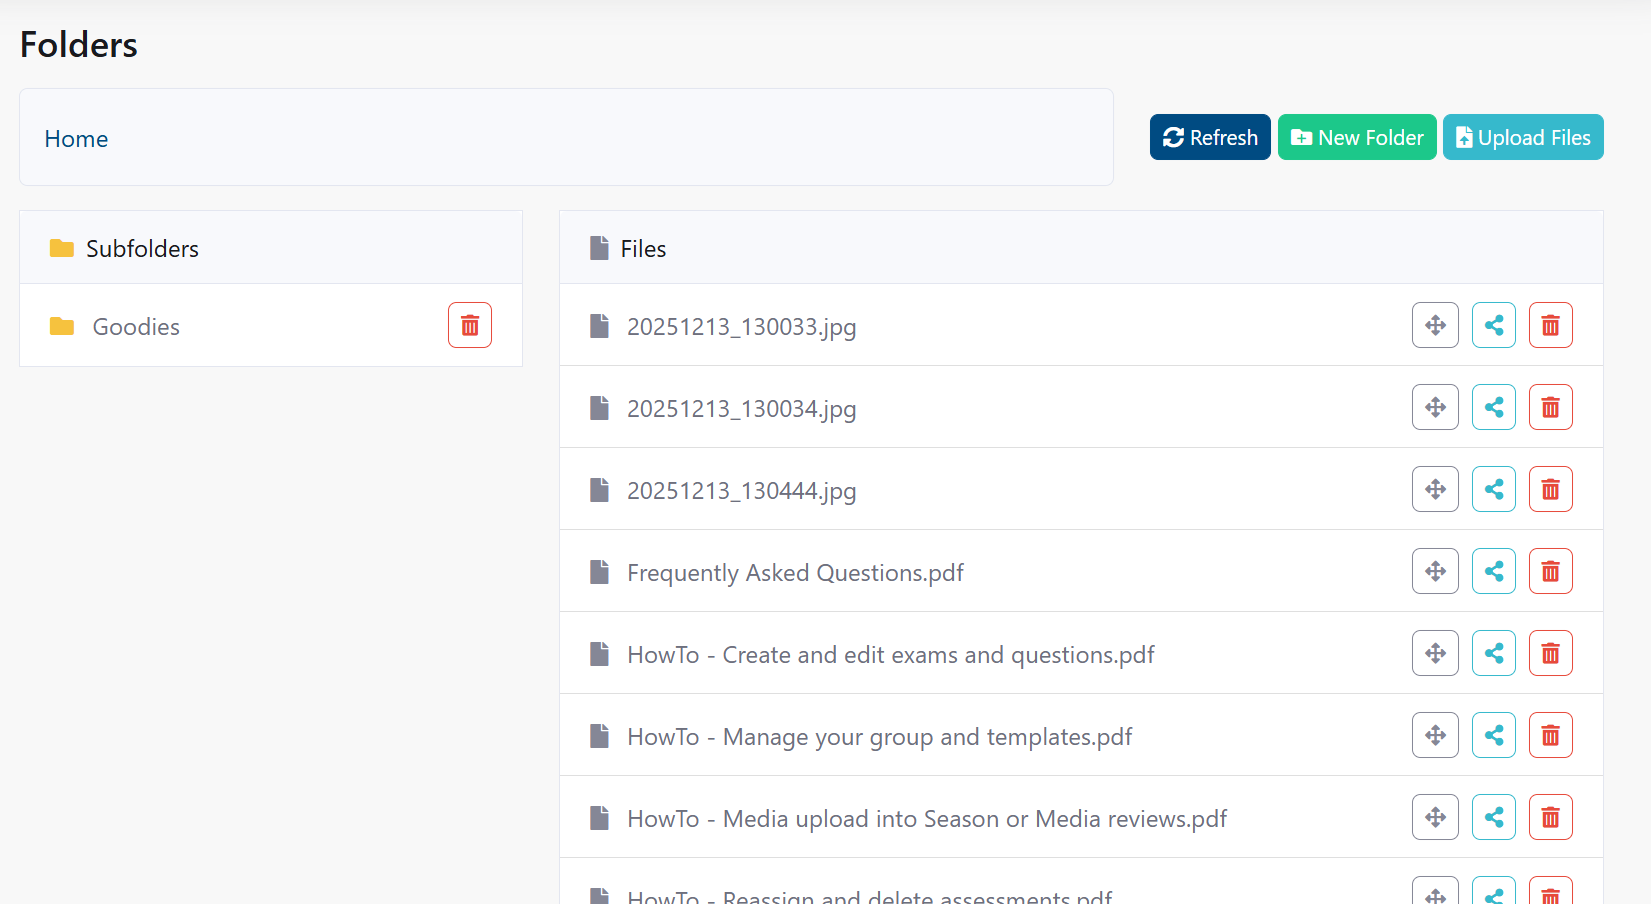
The Folders page is the full-featured file manager for your group's storage. Use it to upload, organize, rename, move, and delete files and folders. For read-only assessment, news and profile picture browsing, see Media.
Capabilities:
- Create folders and subfolders
- Upload single or multiple files
- Rename files and folders
- Move items between folders
- Generate secure, time-limited share links
- Download files (and folders if ZIP download is enabled)
- Delete files and folders
Permissions:
- Access varies by role and subgroup.
- Owners can manage all content; Users typically manage their own uploads.
Understanding Folder Access
Access to folders is controlled by your user role and group membership. Different roles have different permissions.
Access by Role
User
- Can access and upload to their own personal user folder (
User/{your username}) - Cannot create or delete folders outside their personal folder
- Cannot delete files outside their personal folder
- Can only see files they created in their personal folder
Viewer
- Can access personal user folder (if enabled)
- Can view and download files from subgroup folders if assigned to those subgroups
- Cannot upload to subgroup folders
- Cannot create or delete folders
Reviewer
- Can access personal user folder (if enabled)
- Can view and download files from subgroup folders they are assigned to (read-only)
- Cannot upload to group or subgroup folders
- Cannot create or delete folders
Files Manager
- Can access personal user folder (if enabled)
- Can view, upload, and download files from all group and subgroup folders
- Can create, rename, move, and delete folders
- Can delete files
- Can generate share links for any file
Owner
- Full access to all folders in the group and subgroups
- Can create folders at any level
- Can delete folders and files at any level
- Can move files between folders
- Can generate share links for any file
- Unrestricted file management
Special Folders
Your group may have special folders depending on configuration:
User Folder:
- Located at the root level:
User/{username} - Your personal storage space (if enabled by the group)
- Only you can upload and delete files here
- Others cannot access your personal folder
Subgroups Folder:
- Shows team, regional, or division subfolders (if enabled)
- Access depends on your subgroup membership
- Viewers and Reviewers can view these folders (read-only)
- Files Managers and Owners can upload, delete, and manage files
Permissions and Actions
| Action | User | Viewer | Reviewer | Files Manager | Owner |
|---|---|---|---|---|---|
| View files | Own folder only | Subgroups | Subgroups | All folders | All folders |
| Upload files | Personal folder | No | No | All folders | All folders |
| Create folders | No | No | No | Yes | Yes |
| Delete files | Own folder | No | No | Yes | Yes |
| Delete folders | No | No | No | Yes | Yes |
| Move files | Within personal | No | No | All folders | All folders |
| Share files | No | No | No | Yes | Yes |
| Rename files | Own folder | No | No | Yes | Yes |
Breadcrumb
- Shows the current path, e.g.,
Home > Documents > 2024 > Reports. - Click any level to jump there.
- Use Up to go one level up; Home to return to root.
Toolbar
- New Folder: Create a folder in the current path.
- Upload Files: Choose files or drag-and-drop into the grid.
- Refresh: Reload the current folder view.
- Download Selected: Download selected files; folders may download as ZIP (if enabled).
- Share: Create a temporary share link for the selected file.
- Rename: Rename the selected file or folder.
- Move: Move selected items to a different folder.
- Delete: Permanently delete selected items.
File Grid
- Columns: Select, Type, Name, Size, Modified, Actions.
- Sort by clicking column headers; folders typically list before files.
- Right-click an item for a context menu (Open, Download, Rename, Move, Delete, Properties).
Navigating Folders
- Double-click a folder to open it.
- Use breadcrumb segments to jump to any level.
- Use the browser Back button to return while preserving selection state.
Typical structure:
Home/
├── assessments/
│   ├── 2024/
│   │   └── 12/
│   ├── 2025/
│   │   └── 12/
│   └── 2026/
│       └── 01/
├── news/
│   └── attachments/
└── profile/
Creating Folders
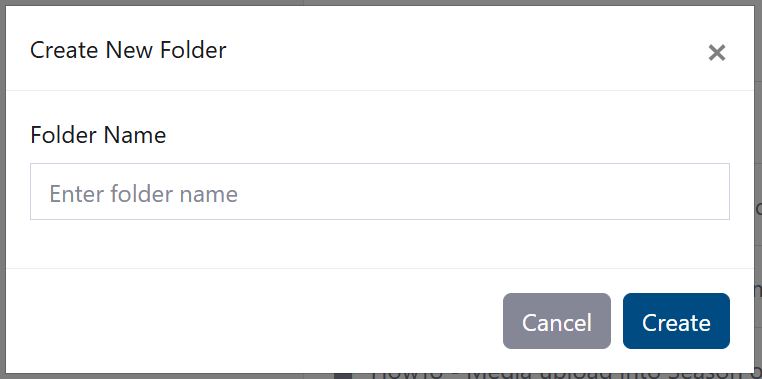
- Navigate to the desired parent folder.
- Click New Folder.
- Enter a name (avoid
/ \ : * ? " < > |). - Click Create.
Results: The folder is created in the current location. You may automatically navigate into it depending on configuration.
Naming tips:
- ✅
2025-Season-Reports,Training Materials - ❌
Reports/2025,Data:Files, very long names
Uploading Files
Upload Button
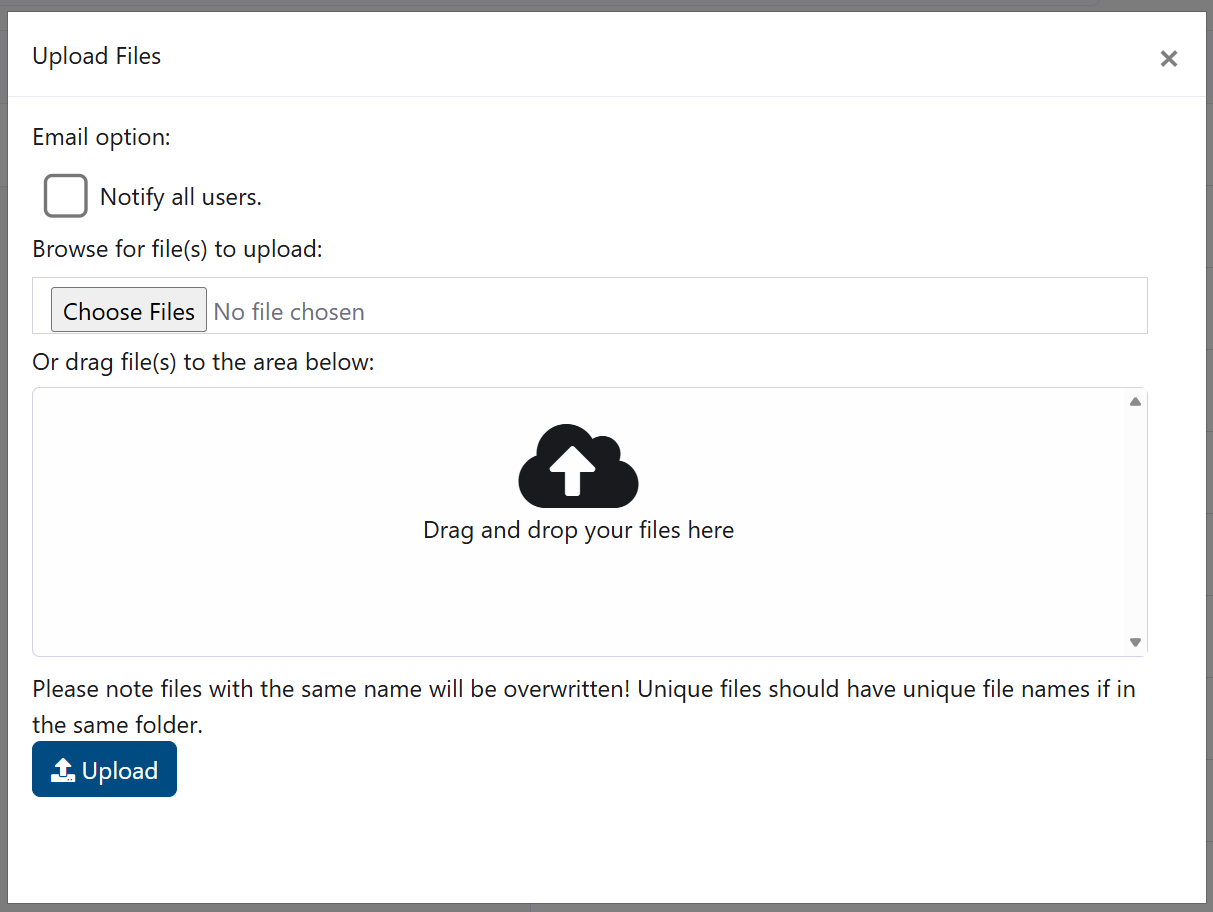
- Navigate to the destination folder.
- Click Upload Files.
- Select one or multiple files.
- Click Upload.
Drag-and-Drop
- Drag files from your computer into the grid to upload.
During upload:
- A progress bar shows overall and per-file progress.
- Large files may take longer; Wi-Fi recommended.
Limits and requirements:
- Typical per-file limit: 10-50 MB (varies by group).
- Allowed types: Most standard document, image, video, and archive formats.
- Blocked types: Executables (.exe), certain scripts, or flagged files.
If a name collision occurs:
- Choose Overwrite, Keep Both (auto-renamed), or Skip.
Managing Files
Rename
- Select a file/folder.
- Click Rename.
- Edit the name (keep extensions unchanged), then save.
Download
- Select a file and click Download.
- For multiple files, use Download Selected; may create a ZIP.
Properties
- Open the context menu → Properties to view size, type, dates, uploaded-by, and (if applicable) share link status.
Share Links
Share links provide temporary access to a single file without requiring MOS login.
- Select one file and click Share.
- Choose expiration: 1, 7, or 30 days.
- Generate and copy the link.
- Send via email or message.
Security:
- Links are hard to guess and expire automatically.
- Revocation may require an Owner to intervene.
Best practices:
- ✅ Use the shortest expiration required.
- ❌ Avoid posting links publicly.
Deleting Items
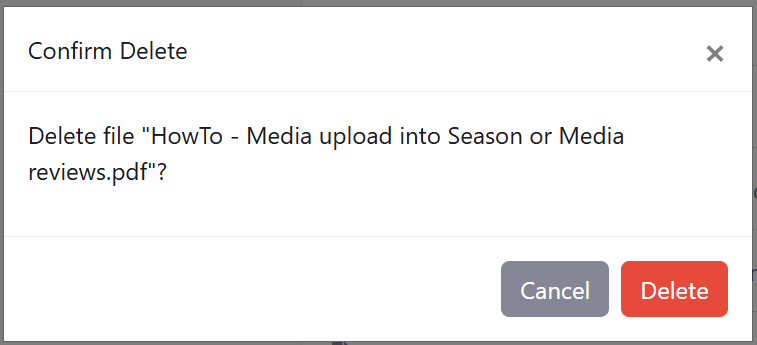
- Select one or more files/folders.
- Click Delete.
- Confirm the permanent deletion.
Deleting folders removes all contents recursively. Consider downloading an archive first if needed.
Moving Files and Folders
- Select items and click Move.
- Choose the destination in the folder tree.
- Click Move Here.
Notes:
- You cannot move a folder into itself or its descendants.
- Conflicts prompt for overwrite, skip, or rename.
Best Practices
- Plan a clear and consistent folder structure.
- Use meaningful file names with dates or versions.
- Archive older content to reduce clutter.
- Prefer share links over email attachments.
Troubleshooting
- Upload fails: Check size/type limits, try smaller batches, or a different browser; contact an Owner if storage is full.
- Missing files: Refresh, verify path, clear filters, or confirm permissions.
- Share link issues: Ensure it hasn’t expired and the file wasn’t moved/deleted.
- Permission denied: Ask an Owner to adjust your access.
Tips
- ✅ Organise by season, project, or assessment.
- ✅ Use breadcrumbs to jump quickly.
- ✅ Clean up duplicates and old versions regularly.